For use with the ABiCUS Gateway
This guide will discuss the steps needed to integrate with URC Total Control.
Table of Contents
URC Module Overview
Firmware Requirements Overview
Step 1. Commission CSI Controllers
Step 2. Locate/Download latest TCM files/Module
Step 3. Adding and Configuring the Module
Step 4. Adding and Configuring the Module (continued)
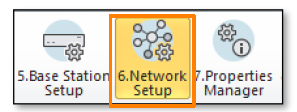
Step 5. Network Setup
Step 6. Properties Manager-Module Parameters
Step 7. Edit User Interfaces
Step 8. Macro Editing
Appendix 1. Two-Way Module Commands
Appendix 2. Queary Commands
Appendix 3. Device Events
Appendix 4. Training Resources
URC Training Resources
--------------------------------------------------------------------------------------------------------------------
URC Module Overview:
Background On URC Support of Converging Systems Devices
| Topic | Details |
|---|---|
| Module Name | Converging Systems Inc. |
| Supported CSI Gateways | e-Node/2x00 Gateways;e-Node/4x00 Gateways;CVM Motor Controller (comm device) |
| Supported CSI Devices | ILC-xxx lighting controllers; IMC-x00 motor controllers; DMX fixtures with e-Node x100 gateways |
| Developer | URC |
| File Type | *.tcm3 |
| Communication | IP |
| Category | Lighting (Motors fall within this Category) |
| Module Type | Core Only |
| Multiple Core Support | Yes |
| Unified | Yes |
| URC Compatibility | Accelerator 3 |
| Device Events | Yes |
| Two-Way Module Commands | Yes |
Firmware Requirements Overview:
Minimum Hardware Firmware Releases Requirements
| Device | FW Level |
|---|---|
| -e-Node MKIII gateways | 2.04.49 or later |
| -e-Node MKIV gateways | 1.01.07 or later |
| -ILC-xxx (non "c" versions) | 2.1.20 or later |
| -ILC-xxx ("c" versions) | 3.4.01 or later |
Step 1. Commission CSI Controllers
Commission all connected ILC-xx0/IMC-xx0 and/or DMX "Fixtures" as per Converging Systems’ Quick Start Guides or Full Version Installation Guides (see below for links).
MOST IMPORTANTLY, ASSIGN ALL Zone/Group/Node and Short Alias Names before proceeding to next Step.
- ILC-x00 CONTROLLERS--Download the most recent Converging Systems ILC-xxx Quick Start Guides (under Lighting Controllers/Quick Start Guides) here
- IMC-xxx/CVM motor channels--Download the most recent Converging Systems Motor Installation Guides (under Motor Controllers/Installation Guides) here
- DMX fixtures (within the e-Node/dmx)--Download the most recent Converging Systems DMX Quick Start Guides here and Programming Manuals (under Gateways e-Node/xx) here
Note: For a detailed/more exhaustive URC Integration Note, review additional information available from URC within Accelerator
Step 2. Locate/Download latest TCM files/Module
If you do not have the latest URC Module in your system file for Version 3.03.0216.2 or later, go to the URC Dealer Portal to download the latest files. The [Core] module contains all the system data that runs and operates the module. [Core} modules do not display on any interface.
Note: For URC OS 3.03.0216.2 and later, Accelerator uses one TCM file to communicate with (i) each Converging Systems gateway with an IP address (i.e., e-Node/xxx, CVM, IMC-170 or OEM branding for such) as well as (ii) any connected load devices (individual ILC-xxx controllers, individual DMX fixture(s) or IMC/CVM motor control channel(s) connected to that gateway). If there is more than one (1) e-Node in the project, add a single core per e-Node.
| Converging Systems Components | URC Certified TCM Module | Latest Converging Systems FW |
|---|---|---|
| e-Node/xx00 gateway (COMM driver) | Download from URC Dealer Portal | Update using Cloud update facility within e-Node |
| ILC-xxx lighting controllers (or DMX channels) (Load driver) | Included within URC TCM download | Update using Cloud update facility within e-Node |
| IMC-xxx motor controllers (Load driver) | Included within URC TCM download | Update using Cloud update facility within e-Node |
Step 3. Adding and Configuring the Module
-

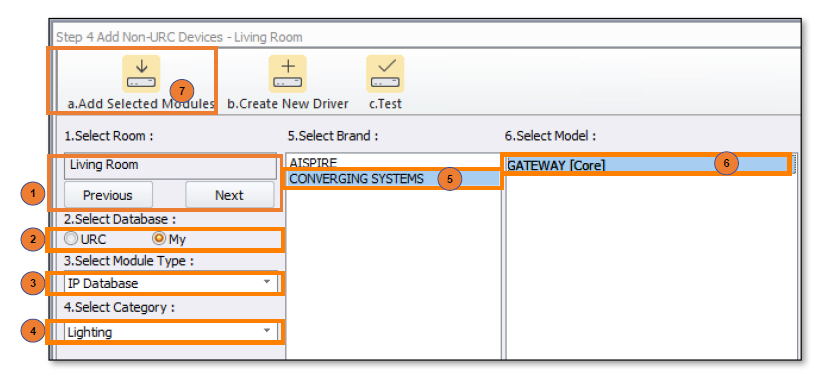
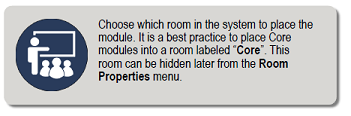
Select a Room into which the core will be added
- Select IP Database
- Select Lighting category
- Select CONVERGING SYSTEMS from the brand list
- Select GATEWAY [Core] from the model list
- Select Add Selected Modules to add it to the project
Step 4. Adding and Configuring the Module (continued)
-
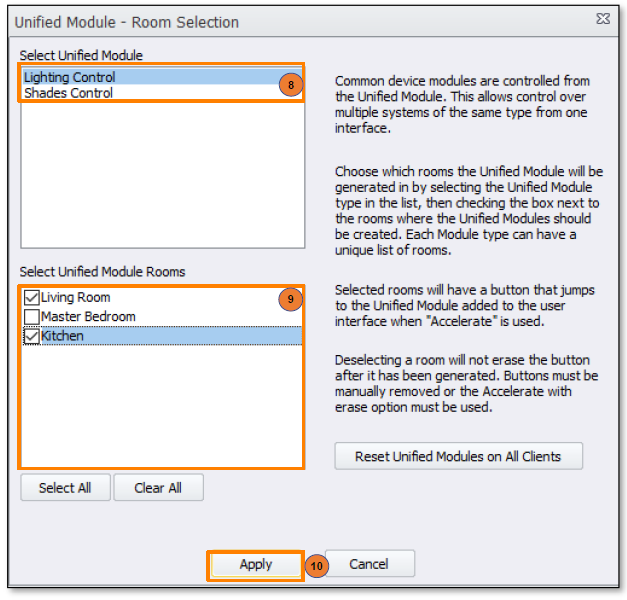
The Unified Module-Room Selection window pops up. This window is asking what rooms to provide access to the unified module
-
When adding a lighting device, select the rooms in which Lighting Control and Shades Control will be displayed
Note: If other unified modules have already been added to the project, do not deselect rooms when adding a new unified module. All unified modules share the Access Control, Climate Control, Lighting Control, and Scene Control buttons - Select Apply
Step 5. Network Setup
-

Select Non URC Device
- Enter the permanent IP Address for the device
- The Port can be left as is
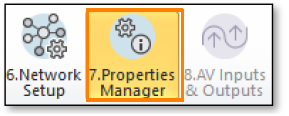
Step 6. Properties Manager-Module Parameters
-
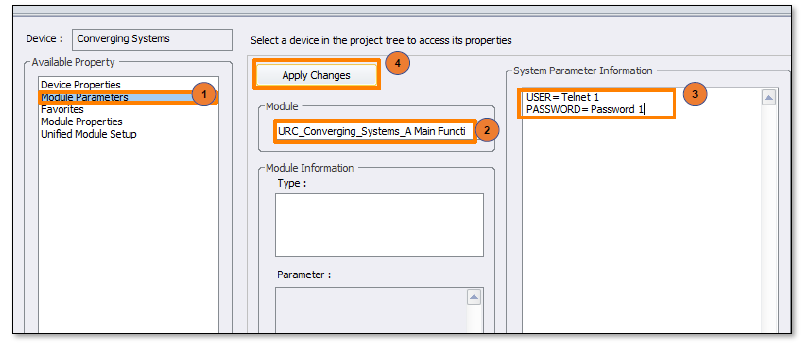
Select Module Parameters of the [Core]
- The Module will be automatically selected for you
- Enter your Converging Systems credentials (typically Telnet 1 for username and Password 1 for password)
- Select Apply Changes
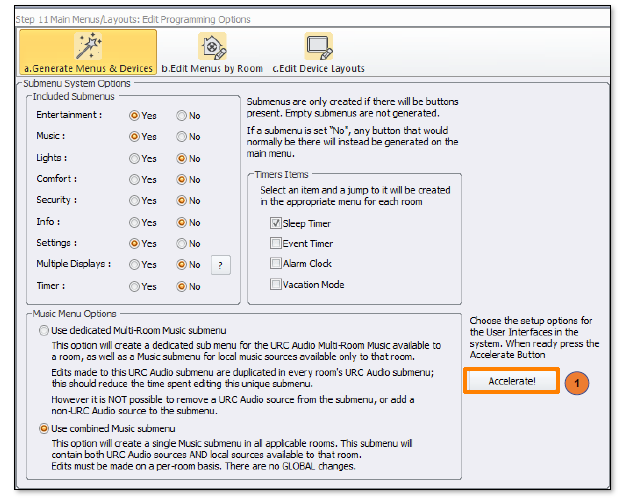
Step 7. Edit User Interfaces
- Select Accelerate

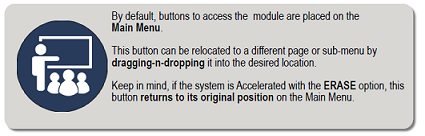
Step 8. Macro Editing

- Select Accelerate
- Make additional programming changes as needed within the remaining steps. Once completed, save the project and Download to the system

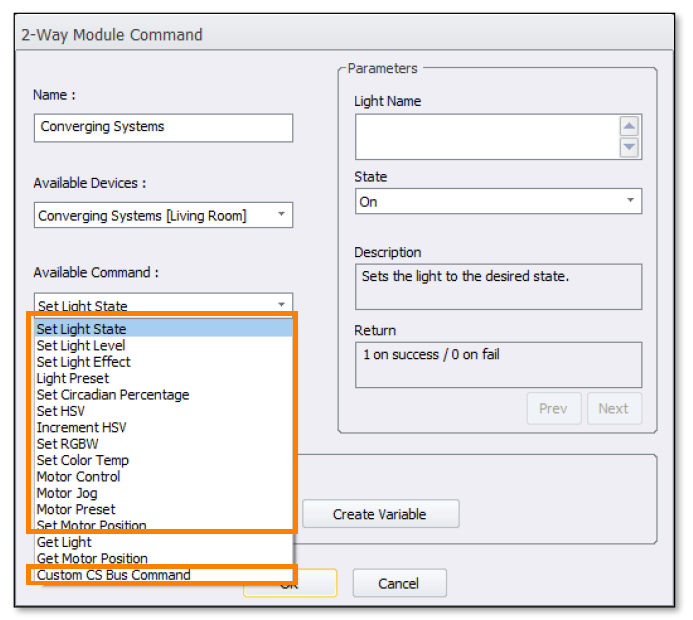
APPENDIX 1. Two-Way Module Commands
Two-way module commands are special functions that are derived from the two-way module, and are the only way to send discrete commands to the Converging Systems eNode.
Before creating a macro, ensure the correct device has been selected from the Available Devices list
| Command | Description |
|---|---|
| Set Light State | Turns a light on or off or sets it to flash |
| Set Light Level | Sets the brightness level of a light) |
| Light Effect | Triggers a specific (supported) light effect (motion) |
| Light Preset | Stores or Recalls a (static) lighting scene |
| Set Circadian Percentage (where supported by device) | Sets the Circadian Percentage Level (all values across range) |
| Set HSV | Set light with Hue (red-0/green-80/blue-160/red-240),Saturation (0~240), and brightness/value (0-240) parameters |
| Increment HSV | Adjust HSV levels up or down |
| Set RGB(W) | Sets light using RGB(W) parameters (0-240 for each parameter) |
| Set CCT (Color Temperature) where supported | Sets light color temperature |
| Motor Control | Moves a motor in the specific direction |
| Motor Jog (where supported) | Moves the motor a specified amount |
| Motor Preset (where supported) | Stores or Recalls a motor's position |
| Set Motor Position (where supported) | Sets a motor's position (0~240) |
| Custom CS-Bus Command | Allows for sending any properly formatted CS-Bus command |
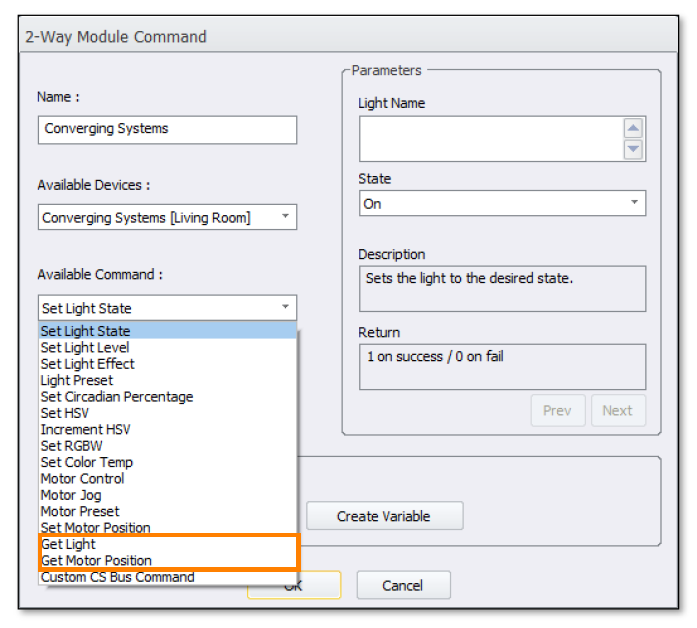
APPENDIX 2. Query Commands
Query Commands allow the Total Control system to ask a device for information. The information can be saved as a variable and used in conjunction with conditional logic to create advanced reactive macros
| Command | Description |
|---|---|
| Get Light | Returns a specific light parameter |
| Get Motor Position | Returns a motor's position |
Device Events
The Converging Systems module has the ability to trigger custom macros based on device status changes within Converging Systems

| Command | Description |
|---|---|
| Light Level Event | Triggers when designated light matches a set operator and value |
| Any Light Level Event | Triggers anytime the designated light reports a new level |
| Motor Position Event (where supported) | Triggers when designated motor matches a set operator and value |
| Any Motor Position Event (where supported) | Triggers anytime the designated motor reports a new level |
APPENDIX 3. Device Events
The Converging Systems module has the ability to trigger custom macros based on device status changes within Converging Systems
| Command | Description |
|---|---|
| Light Level Event | Triggers when designated light matches a set operator and value |
| Any Light Level Event | Triggers anytime the designated light reports a new level |
| Motor Position Event (where supported) | Triggers when designated motor matches a set operator and value |
| Any Motor Position Event (where supported) | Triggers anytime the designated motor reports a new level |
Training Resources
For additional information on using macros in automation, and macro theory, refer to the following Self-Paced Tutorials linked below:
Comments
0 comments
Please sign in to leave a comment.